自定义镜像
本文将介绍如何自定义应用。
简介
这里的应用其实指的是 docker 镜像,docker 镜像中安装了一系列的软件和库。如何使用 docker 可以参考互联网其他教程。由于本项目并不需要用户直接使用 docker,因此本文仅介绍如何通过 Dockerfile 制作镜像。
什么是 Dockerfile?其实就是一个文本文件,包含了构建 Docker 镜像的各种指令,通过编写 Dockerfile 我们定义了我们的镜像中包含哪些软件。当我们拿到一个 Dockerfile 就可以按照 Dockerfile 构建出想要的镜像。由于本项目已经预定义好了 Dockerfile,用户只需要在现有的 Dockerfile 基础上添加自己想安装的软件即可。
本项目使用 git 管理,用户只需要在 Dockerfile 中添加想安装的软件和库,通过 git 提交到 github,即可自动构建镜像。由于构建过程在 github,因此用户无需考虑本地的流量和网速,仅需拿到最终的镜像名即可。
前置准备
- 了解 Docker 基本概念,可参考以下文档
- 学习 git 操作
- 了解 github action(本项目仅了解即可)
本项目仓库为 linuzb/jupyter-container
主要流程如下
- 学习如何参与开源项目 - 细说 GitHub 上的 PR 全过程
- 申请仓库linuzb/jupyter-container权限,请联系管理员
- 如果仓库中有自己的 Dockerfile,则直接修改。如果仓库中没有,复制一份基础的 Dockerfile,然后再修改。
- 提交代码(其实就是 Dockerfile)到远程仓库
- 查看 github action,检查是否成功构建出镜像
- 将镜像名提交给管理员,发布到jupyterhub(后续将考虑自行部署或者自动部署)
熟悉仓库结构
仓库目录结构如下
.
├── .github
│   └── workflows
│       ├── build-push-jupyter-pytorch-qlora.yaml
│       ├── build-push-jupyter-pytorch-qlora-zx.yaml
│       └── build-push-jupyter-pytorch-x.yaml
├── LICENSE
├── README.md
└── src
    ├── jupyter-pytorch-qlora
    │   ├── Dockerfile
    │   ├── noop.txt
    │   └── requirements.txt
    ├── jupyter-pytorch-qlora-zx
    │   ├── Dockerfile
    │   ├── noop.txt
    │   └── requirements.txt
    └── jupyter-pytorch-x
        ├── Dockerfile
        ├── noop.txt
        └── requirements.txt
该目录主要分为两个部分
src目录是应用的存放目录。每个应用对应一个文件夹,例如jupyter-pytorch-x,每个文件夹下面都有一个 Dockerfile.github/workflows目录是 github 自动构建镜像的配置。每个src中的应用都对应一个 workflow。例如,src/jupyter-pytorch-x对应.github/workflows/build-push-jupyter-pytorch-x.yaml。后续如果创建新的应用需要在src目录和.github/workflows同时创建配置
Dockerfile 基本概念
这里仅介绍涉及本项目应用的基本概念。完整的 Dockerfile 知识请参考其他文档。
- 安装软件
例如:src/jupyter-pytorch-x/Dockerfile中,我们将需要安装的软件放到以下命令中。
RUN apt-get update --yes \
    && apt-get install --yes --no-install-recommends \
    # build-essential \
    wget \
    curl \
    # - pandoc is used to convert notebooks to html files
    #   it's not present in the aarch64 Ubuntu image, so we install it here
    pandoc \
    vim \
    # git \
    zip \
    # unzip \
    libopenmpi-dev \
    tmux \
    screen \
&& apt-get clean && rm -rf /var/lib/apt/lists/*- 安装 vscode
例如:src/jupyter-pytorch-x/Dockerfile. 以下例子用户无需了解,仅展示除了 apt/apt-get 命令还可以使用其它方式安装软件。
# Installation de Code Server et server-proxy/vscode-proxy pour intégrer Code dans JupyterLab
# Install VSCode extensions
ENV CODE_VERSION=4.22.1
RUN curl -fOL https://github.com/coder/code-server/releases/download/v$CODE_VERSION/code-server_${CODE_VERSION}_amd64.deb && \
    dpkg -i code-server_${CODE_VERSION}_amd64.deb && \
    rm -f code-server_${CODE_VERSION}_amd64.deb
    # EXT_LIST="ms-python.python zhuangtongfa.material-theme" && \
# for EXT in $EXT_LIST; do code-server --install-extension $EXT; done- 使用 mamba/conda 安装包
例如:src/jupyter-pytorch-x/Dockerfile 中 安装了 jupyter-server-proxy 和 jupyter-vscode-proxy, 如果需要安装其它包,添加到其中即可。
注:mamba 兼容 conda,可以视作 conda 使用。
# mamba/conda instsall
RUN mamba install --yes \
    'jupyter-server-proxy' \
    'jupyter-vscode-proxy' && \
    mamba clean --all -f -y && \
    fix-permissions "${CONDA_DIR}" && \
fix-permissions "/home/${NB_USER}"- 使用 pip install 安装包
例如 src/jupyter-pytorch-x/Dockerfile
# [Optional] If your pip requirements rarely change, uncomment this section to add them to the image.
COPY requirements.txt noop.txt /tmp/pip-tmp/
RUN if [ -f "/tmp/pip-tmp/requirements.txt" ]; then pip3 --disable-pip-version-check --no-cache-dir install -r /tmp/pip-tmp/requirements.txt; fi \
   && rm -rf /tmp/pip-tmp \
   && fix-permissions "${CONDA_DIR}" \
   && fix-permissions "/home/${NB_USER}"
直接将 pip 包写到 src/jupyter-pytorch-x/requirements.txt 即可。
# https://pytorch.org/get-started/previous-versions/
--index-url https://download.pytorch.org/whl/cu118torch==1.12.0+cu116
torch==2.2.1
torchvision==0.17.1
torchaudio==2.2.1

--index-url https://pypi.org/simple
mpi4py
transformers==4.28.1
icetk
# peft https://github.com/artidoro/qlora/issues/154
git+https://github.com/huggingface/peft
deepspeed==0.9.2
accelerate
cpm_kernels
sentencepiece==0.1.99
bitsandbytes
github action 基本概念
我们前面讲过,Dockerfile 的配置要和 github action 的配置成对出现。前者定义了应用的环境,后者按照 Dockerfile 自动构建镜像。这里我们简单介绍下相关的配置
以 .github/workflows/build-push-jupyter-pytorch-x.yaml 为例
- 触发条件:
- 分支:
mian分支和以feat/开头的分支一旦有变动则触发镜像构建 - 路径:
src/jupyter-pytorch-x/目录下的文件发生变动则触发镜像构建,其中 1 和 2 需要同时满足才能触发
- 分支:
on:
  push:
    branches:
    - main
    - 'feat/**'
    paths:
    - 'src/jupyter-pytorch-x/**'
workflow_dispatch:- 基础镜像
我们知道,Docker 镜像可以基于另一个 docker 镜像(基础镜像)构建。我们下面的配置通过环境变量定义了基础镜像的镜像名和tag。如果需要更换基础镜像,可以修改以下环境变量。
以下配置是定义的环境变量,
其中
TARGET_REGISTORY,TARGET_NAMESPACE定义了目标镜像的地址。这个都是统一的,请不要修改。WORKLOAD_TYPE是应用目录(没有src/前缀),请和上面的paths保持一致BASE_REGISTORY,BASE_NAMESPACE,BASE_IMAGE,BASE_TAG用来定义基础镜像的地址,地址为${{ env.BASE_REGISTORY }}/${{ env.BASE_NAMESPACE }}/${{ env.BASE_IMAGE }}:${{ env.BASE_TAG }}. 以下环境变量拼接的基础镜像地址为quay.io/jupyter/scipy-notebook:python-3.11
env:
  TARGET_REGISTORY: registry.cn-hangzhou.aliyuncs.com
  TARGET_NAMESPACE: linuzb
  WORKLOAD_TYPE: jupyter-pytorch-x
  # Dockerfile: https://github.com/jupyter/docker-stacks/blob/main/images/pytorch-notebook/cuda11/Dockerfile
  # image: https://quay.io/repository/jupyter/pytorch-notebook?tab=tags
  BASE_REGISTORY: quay.io
  BASE_NAMESPACE: jupyter
  BASE_IMAGE: scipy-notebook
BASE_TAG: python-3.11- 目标镜像
目标镜像为 ${{ env.TARGET_REGISTORY }}/${{ env.TARGET_NAMESPACE }}/${{ env.BASE_IMAGE }}-${{ env.ENV_DETIL }}:${{ env.BASE_TAG }}-${{ env.APP_VERSION }}
为了区分其它应用,可以在目标镜像上添加自己的应用名,可以在 ${{ env.BASE_IMAGE }} 之后添加应用名等字段,例如添加 qlora
原配置
          tags: |
            ${{ env.TARGET_REGISTORY }}/${{ env.TARGET_NAMESPACE }}/${{ env.BASE_IMAGE }}:${{ env.BASE_TAG }}-${{ env.APP_VERSION }}
新配置
          tags: |
${{ env.TARGET_REGISTORY }}/${{ env.TARGET_NAMESPACE }}/${{ env.BASE_IMAGE }}-qlora:${{ env.BASE_TAG }}-${{ env.APP_VERSION }} 目标镜像tag最后一个字段是 ${{ env.APP_VERSION }}, 这个是本次 git 提交记录的 hash值(commit id),我们可以根据镜像上这个 hash 值找到对应的 git 提交记录。该值自动生成,无需修改。
创建新的应用流程
创建应用
- 首先复制
src/jupyter-pytorch-x目录,新目录为src/jupyter-pytorch-sample - apt 安装软件
- mamba/conda 安装包
- pip 安装包
创建 github action 配置
- 首先复制
.github/workflows/build-push-jupyter-pytorch-x.yaml文件,新文件为.github/workflows/build-push-jupyter-pytorch-x.yaml - 修改
name: 'Build jupyter pytorch sample' - 修改
paths - 修改环境变量
BASE_TAG, 如果需要的话 - 在目标地址上添加应用名
查看镜像
以上流程完成之后,会在action页面出现构建镜像的自动化流程。如果失败,请查看原因,重新修改后提交。
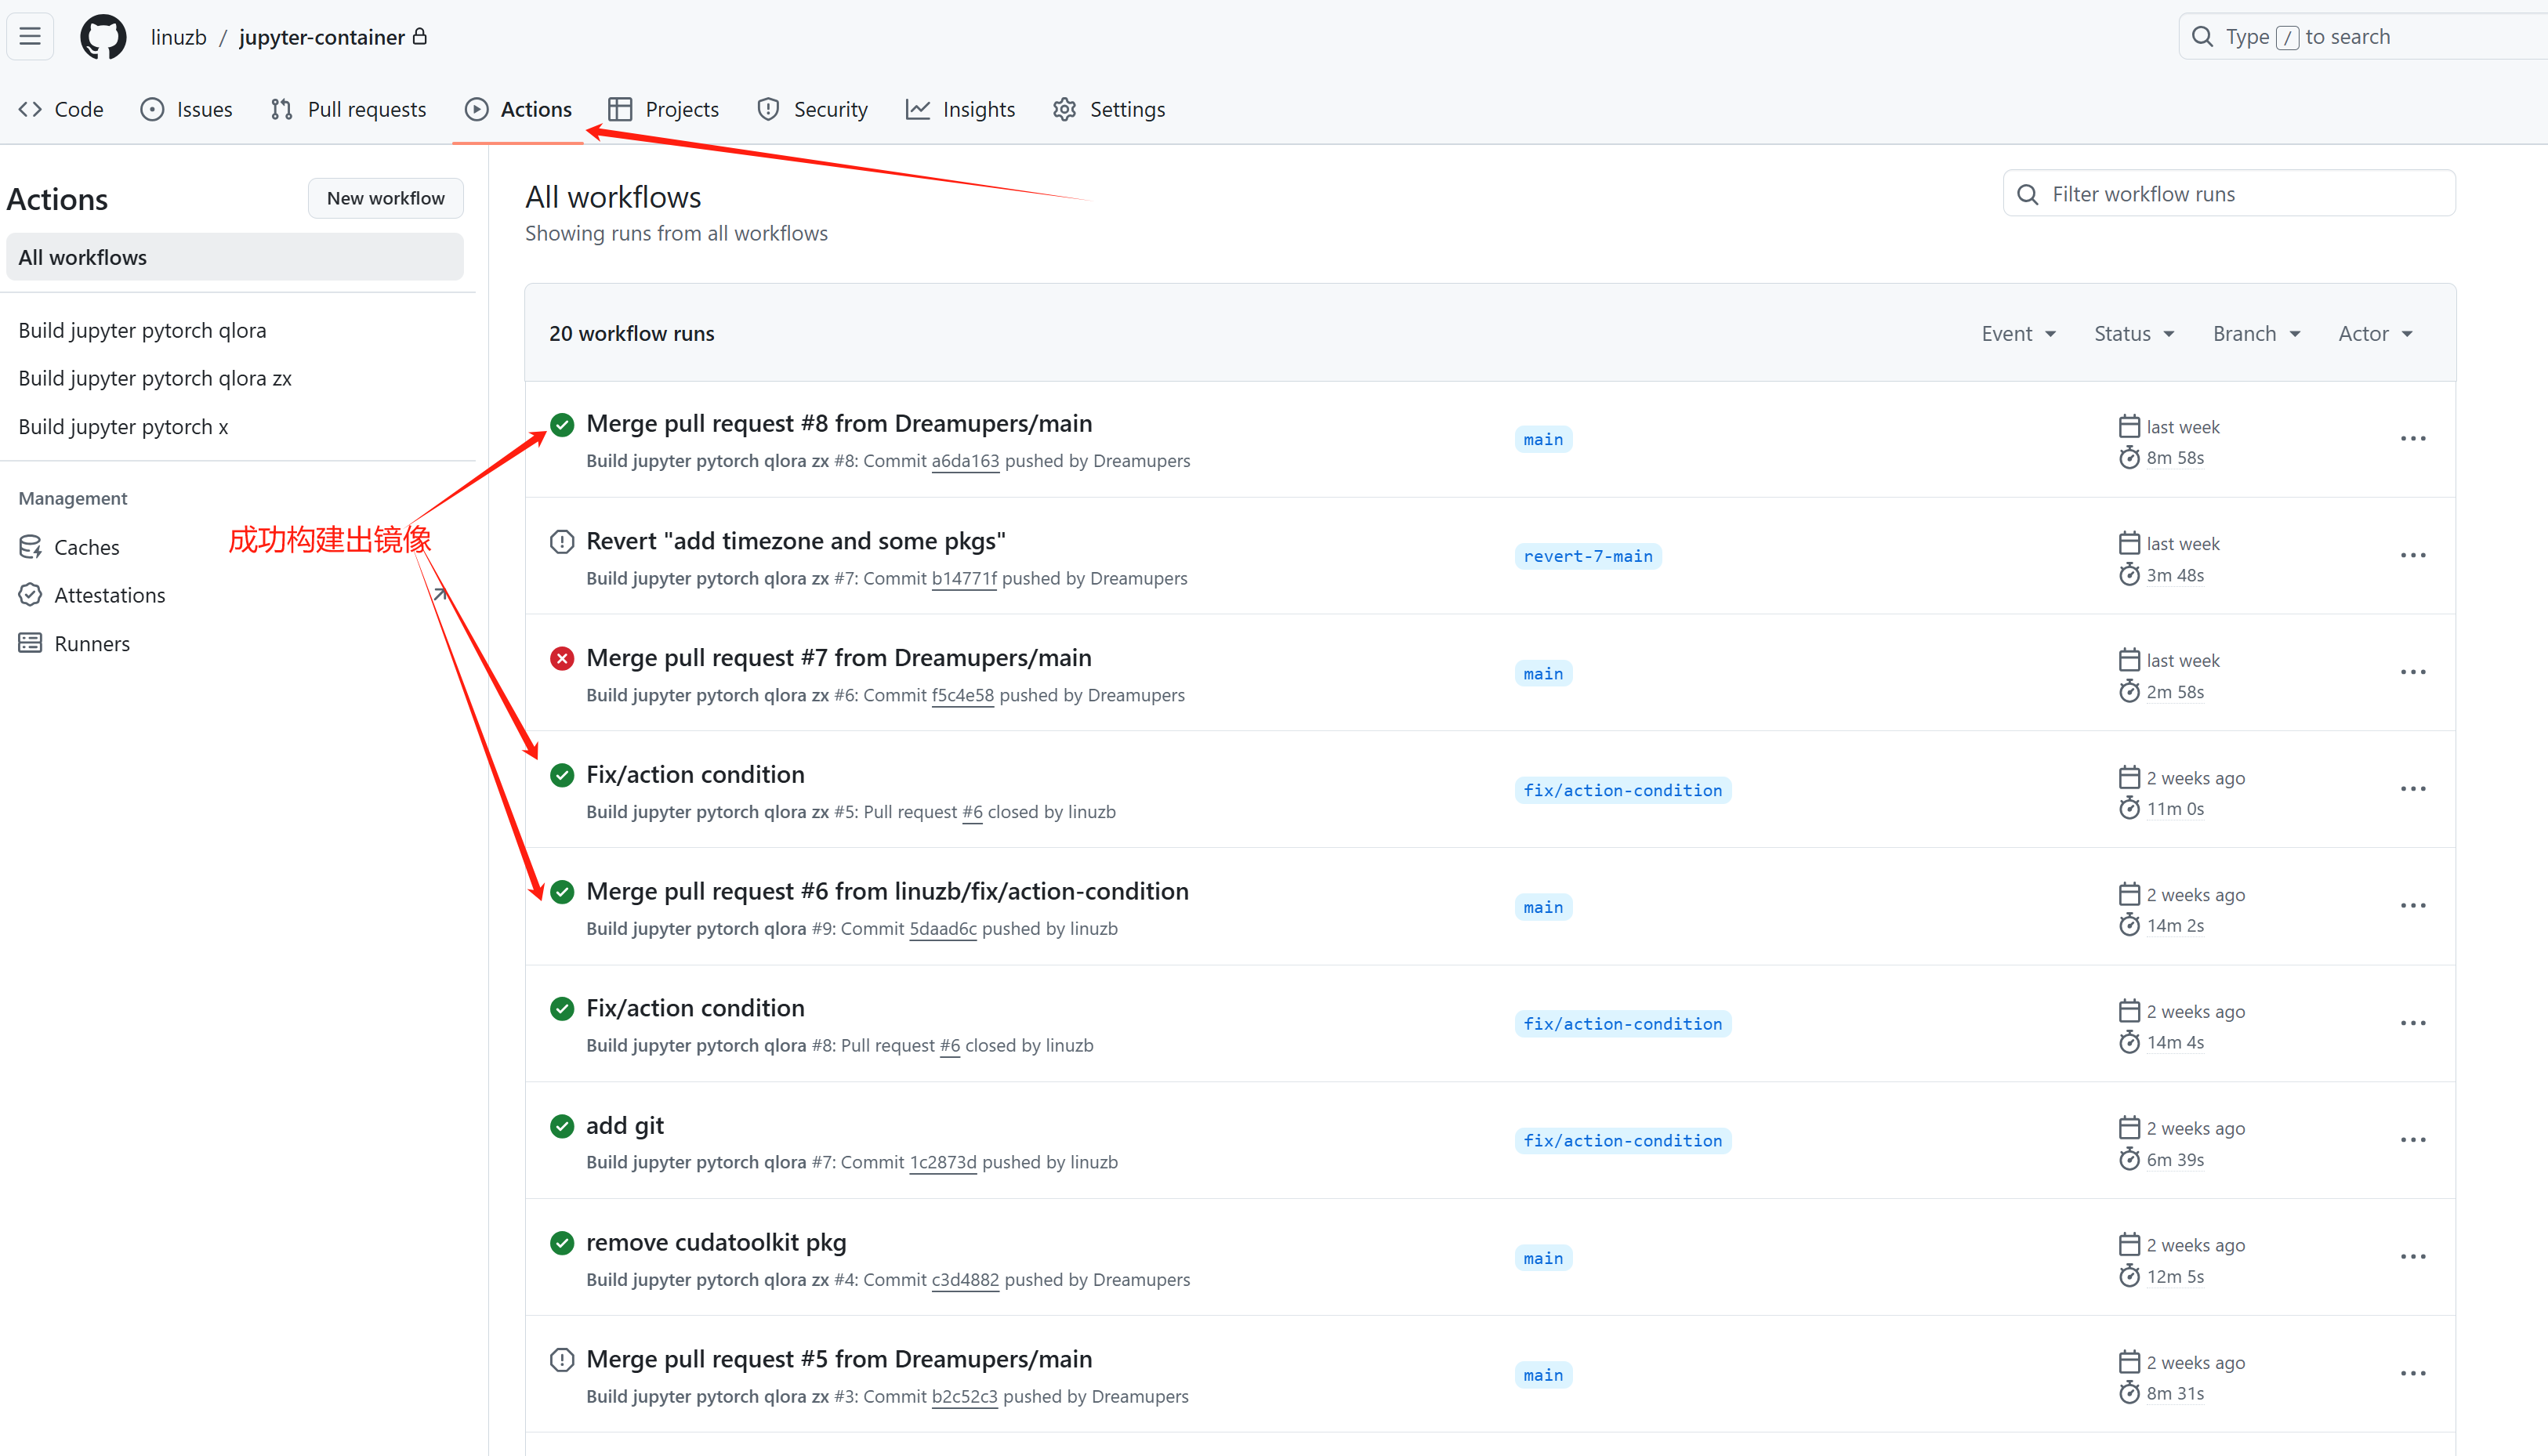
如果镜像构建完成, 点击对应的 action -> build, 进入build页面,然后点击 Build and push,下滑到页面最低端,查找 “Metadata” 最后找到 “image.name” 即使最终目标镜像名。
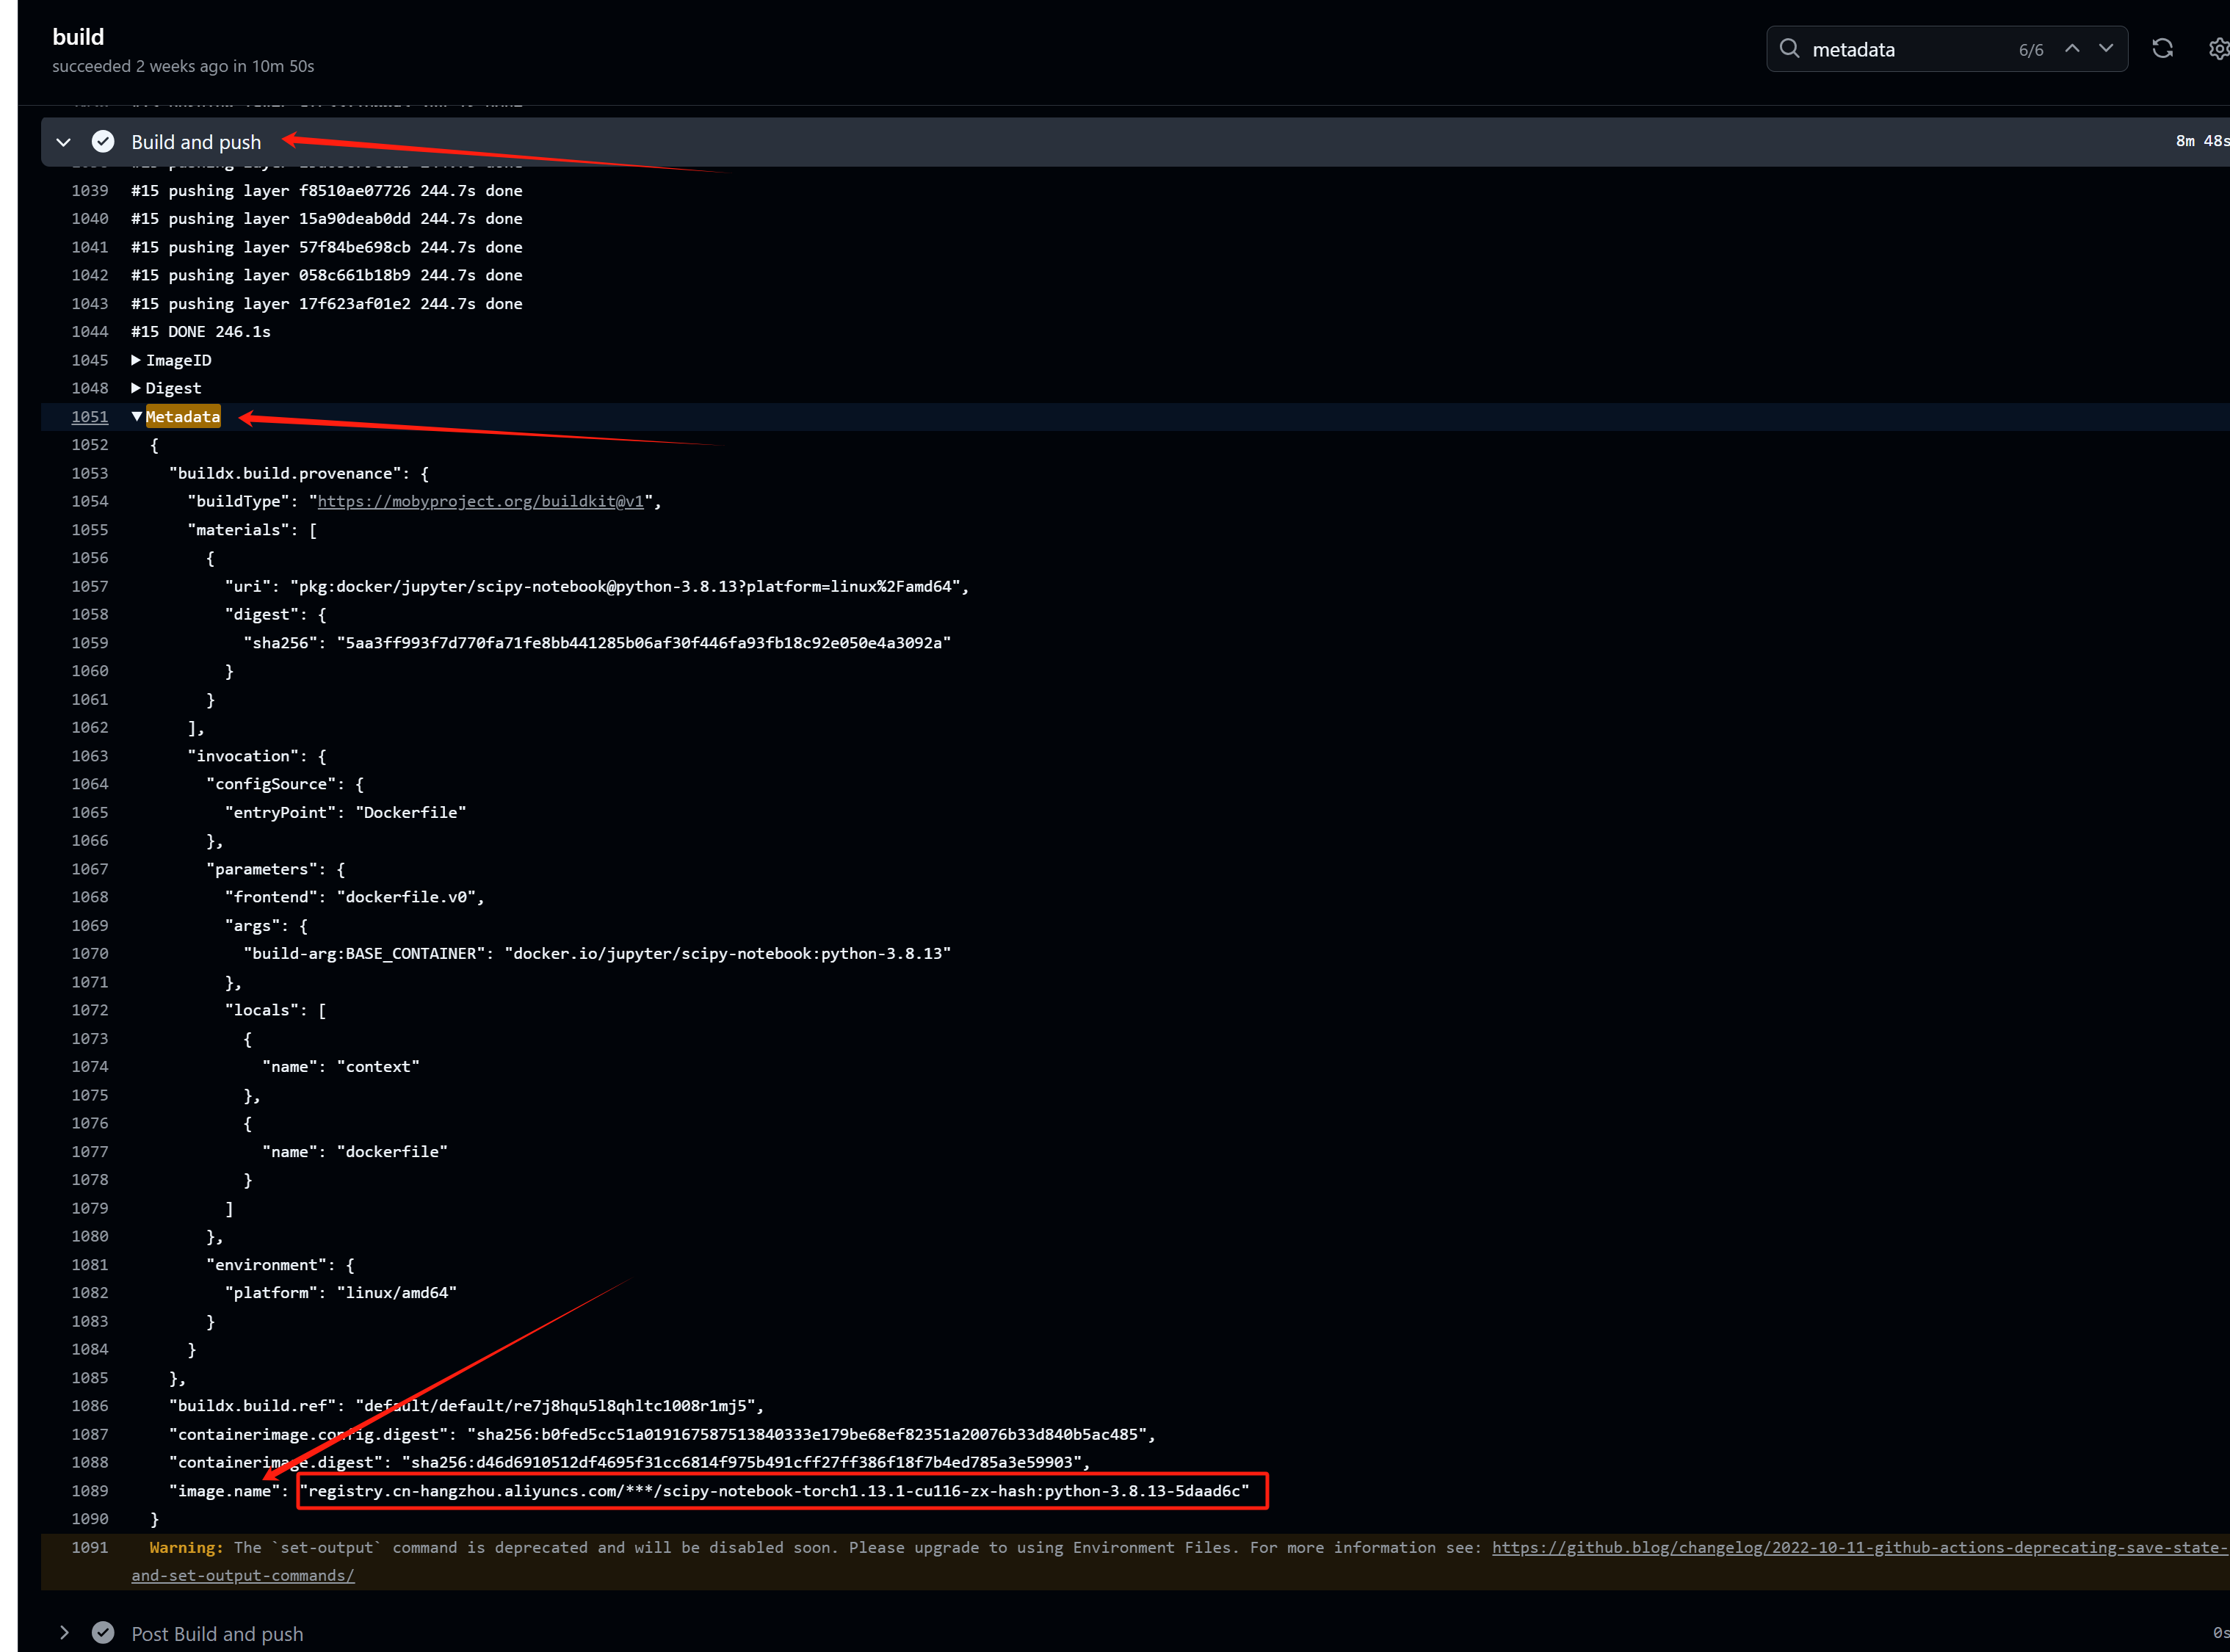
将目标镜像发给管理员,发布到集群。